Do you dream of achieving fuller, thicker brows effortlessly from the comfort of your home? Imagine waking up to perfectly groomed brows every day without the need for expensive salon treatments or time-consuming makeup routines. With a simple lamination technique, you can transform your brow game and enjoy visible results that enhance your natural beauty. Discover the secrets to mastering this easy routine and unlock the potential of your brows like never before.
Have you ever felt like your brows could use a little extra oomph? Perhaps you’ve struggled to find the right products or techniques to achieve the full brow look you desire. Well, fret not because the solution might be simpler than you think. By following a few easy steps and embracing the art of brow lamination, you can elevate your beauty game with minimal effort and maximum impact. Say goodbye to thin, unruly brows and hello to beautifully groomed brows that frame your face flawlessly.
Understanding the Basics of Brow Lamination
Before diving into the step-by-step process of brow lamination, it’s essential to understand what this technique entails. Brow lamination is a semi-permanent treatment that helps to set brow hairs in a particular shape, creating a fuller and more defined look. This process involves restructuring the brow hairs to redirect them for a more uniform and groomed appearance. The result is a set of beautifully shaped brows that stay in place for an extended period, eliminating the need for daily grooming.

| Benefits of Brow Lamination | Drawbacks of Brow Lamination |
|---|---|
| Creates the illusion of fuller brows | Potential for allergic reactions |
| Lasts for several weeks | Requires maintenance for long-lasting results |
Gathering Your Tools and Preparing for Brow Lamination
Before embarking on your brow lamination journey, it’s crucial to gather all the necessary tools and products. A calm and organized space will help you focus on the task at hand and achieve optimal results. Here are the essential items you’ll need:
| Tools and Products | Function |
|---|---|
| Brow Lamination Kit | Contains solutions for perming and setting brow hairs |
| Brow Brush or Comb | Helps to shape and style brow hairs |
| Cleanser | Prepares the brow area for lamination |
| Spoolie | Assists in grooming and blending brow hairs |
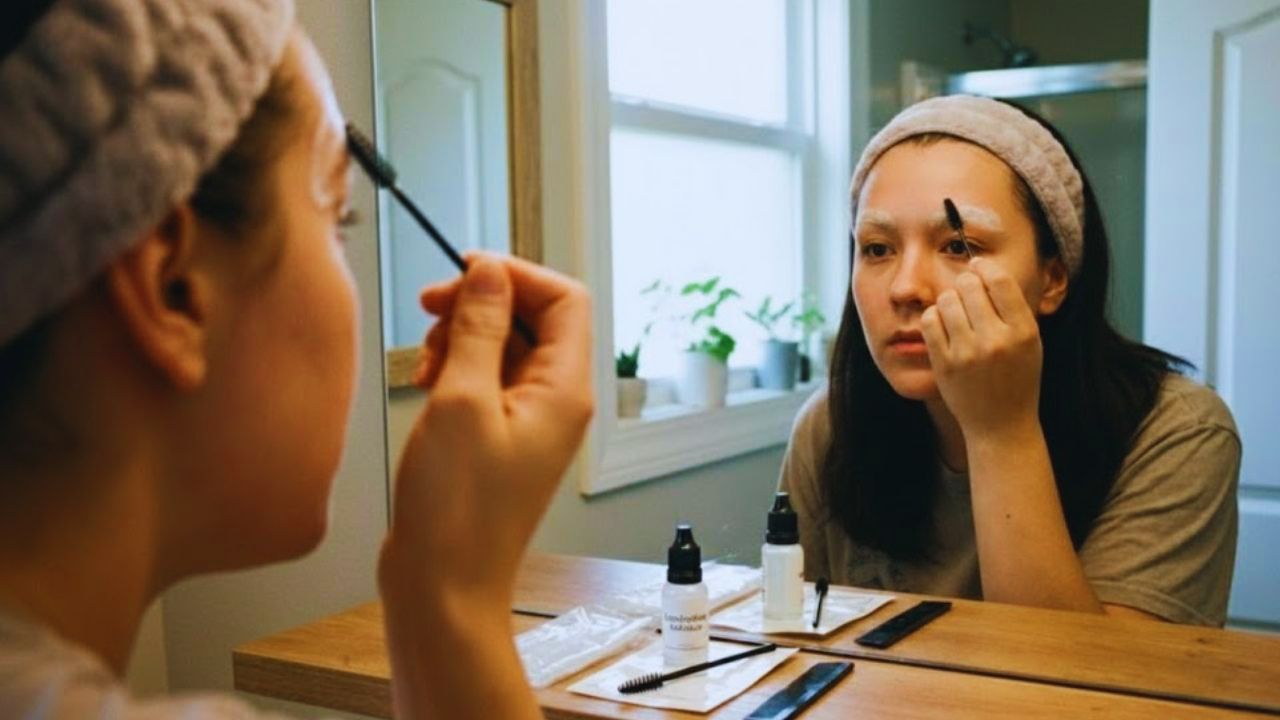
Step-by-Step Brow Lamination Routine
Now that you have all your tools ready, it’s time to embark on the step-by-step journey of achieving fuller, thicker brows at home through lamination. Follow these instructions carefully to ensure a successful lamination process and enjoy the benefits of styled brows that last for weeks:
Expert Opinion: “Brow lamination is a game-changer for those looking to enhance their natural brows without the hassle of daily grooming. With the right technique and products, anyone can achieve salon-quality results from the comfort of their own home.” – Beauty Specialist

1. Thoroughly Cleanse the Brow Area: Start by cleansing your brows with a gentle cleanser to remove any dirt, oil, or makeup residue. This step will ensure that the lamination products adhere properly to your brow hairs, allowing for better results.
2. Observe Your Natural Brow Growth Pattern: Take a moment to study the direction in which your brow hairs grow. Understanding your natural growth pattern will help you shape your brows more effectively during the lamination process.
3. Gently Relax Brow Hairs Before Styling: Use a brow brush or comb to gently relax and separate your brow hairs. This step will make it easier to shape and style your brows according to your desired look.

Shaping and Securing Your Brows
After preparing your brows for lamination, it’s time to shape and secure them in place for long-lasting results. Follow these next steps to achieve perfectly groomed brows that stay put:
Saying: “Brows are the frame of your face, and with the right lamination technique, you can sculpt them to perfection, enhancing your natural beauty effortlessly.”
1. Shape Brows With Intent, Not Pressure: Use the brow lamination kit to shape your brows according to your desired look. Be gentle and precise in your application, avoiding excessive pressure that may cause damage to your brow hairs.

Expert Opinion: “The key to successful brow lamination lies in understanding the unique characteristics of each individual’s brows and tailoring the lamination process accordingly. Attention to detail is crucial for achieving optimal results.” – Brow Specialist
2. Secure the Brow Shape for Lasting Hold: Once you’ve shaped your brows, ensure that the lamination products set properly to secure the desired shape. Follow the instructions provided in the kit for the appropriate duration to achieve lasting hold.
Post-Care Tips for Naturally Settled Brows
After completing the brow lamination process, it’s essential to follow post-care tips to help your brows settle naturally and maintain their groomed appearance. Implement the following practices to prolong the effects of lamination:

Saying: “Good things take time, and with patience and proper care, your lamination results will shine through, giving you beautiful, effortless brows every day.”
1. Avoid Wetting Your Brows: In the first 24-48 hours after lamination, refrain from wetting your brows to allow the products to set properly. Moisture can interfere with the lamination process and compromise the results.
2. Use a Brow Serum: Incorporate a nourishing brow serum into your daily skincare routine to keep your brow hairs healthy and promote growth. This will enhance the overall appearance of your brows and prolong the effects of lamination.

Frequently Asked Questions (FAQs)
Q: How long does brow lamination last?
A: Brow lamination can last anywhere from 4 to 6 weeks, depending on individual hair growth cycles and maintenance practices.
Q: Is brow lamination suitable for all skin types?
A: While brow lamination is generally safe for all skin types, individuals with sensitive skin should perform a patch test before full application.
Q: Can I apply makeup on laminated brows?
A: It is recommended to avoid applying makeup directly on freshly laminated brows to prevent product buildup and maintain the longevity of the lamination.

Q: How often should I repeat the brow lamination process?
A: Brow lamination can be repeated every 4 to 6 weeks to maintain the desired shape and fullness of the brows.
Q: Can I remove brow lamination at home?
A: It is recommended to visit a professional for brow lamination removal to avoid damaging the natural brow hairs. Attempting to remove lamination at home may result in hair breakage.
Q: Are there any side effects of brow lamination?
A: Some individuals may experience mild redness or irritation after brow lamination, which typically subsides within a few hours. If persistent, discontinue use and consult a dermatologist.

Q: Can I swim or exercise after brow lamination?
A: It is advisable to avoid prolonged exposure to water or sweat immediately after brow lamination to allow the products to set properly. After 24-48 hours, you can resume regular activities.
Q: How can I maintain the shape of my laminated brows between treatments?
A: Use a brow gel or styling product to groom and shape your brows daily. This will help maintain the lamination effects and keep your brows looking polished.


Leave a Comment